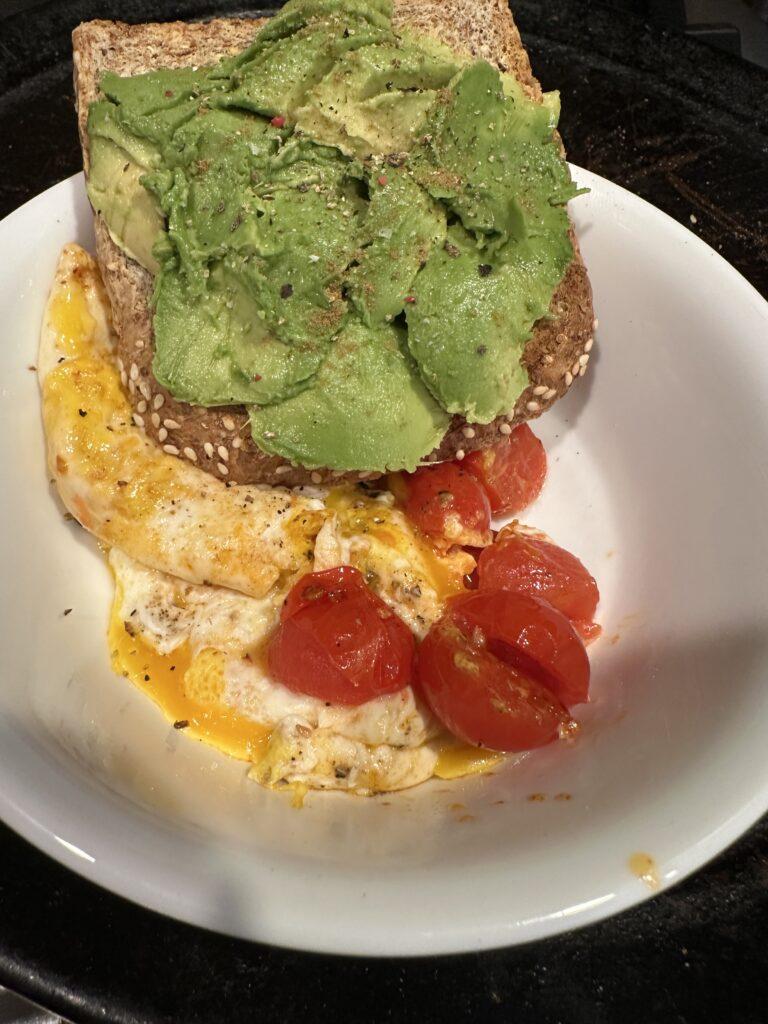
Start to finish, this excellent breakfast should take about 5 minutes to prepare.
Ingredients
Slice of any bread of your choice (this one was a seeded wheat)
1/2 avocado
5 cherry tomatoes, sliced in half
1 egg
1 TBSP butter
Salt
Pepper
Cumin (optional)
Directions
I first gather my ingredients. Slice the avocado. Slice tomatoes. Get my trusty egg pan and silicone spatula. Begin warming the butter in the pan. Use a medium to low heat. When the butter is melted, add the tomatoes to allow them soften and get warm. Once they are ready, about 2 minutes, remove to the side. Crack your egg into the same pan. If you dare, go now and drop your toast in your toaster. I like 3 minutes for a pretty brown toast. The time may vary by toaster. Return to your egg. If you are making a fried egg, I go ahead and bust the yolk at this point. You want it to spread through the white, but not make a scrambled egg. Salt and pepper as you like, then flip. With a total cook time of 3 minutes, your egg should be done.
It’s time to assemble. Slather the 1/2 avocado onto the toast. Salt and pepper. I actually add a little cumin, as well. I love the extra earthy flavor bomb it provides. In my photo, you see that I dropped my cooked eggs and tomatoes into a bowl. I wanted to dip my toast in the egg, as I made it over easy on that day. You may like to pile all ingredients onto your toast?
However you build yours, I hope you have had fun! Enjoy. And please feel free to comment.
Take a look at this beauty! Lots of herbs and butter. Delicious.
Ingredients
1 whole (preferably organic, loved) chicken
1 onion – yellow or white, course chopped
1 entire garlic bulb
1 leMon
Carrots and potatoes, if you want to roast them along side the chicken while roasting
1 tablespoon kosher salt
1 teaspoon celery seed OR 1-2 celery stalks
2 teaspoons or more fennel pollen – my secret ingredient
1 teaspoon pepper
1 tablespoon thyme
1/2 tablespoon Rosemary
1/2 tablespoon parsley
1/2 stick butter slightly warm
~1 quart chicken stock
Preparation
Oven preheated to 425F
dutch oven its best, but roasting pan will do
rinse bird, remove giblets ( use to boil later for broth!), pat dry and allow to come to room temp while chopping and such
Generously salt and pepper inside and out, if using celery seed, sprinkle inside and out. If using celery stalk, place some inside and drop the rest in Dutch oven or roasting pan.
Cut lemon into quarters and squirt juices inside cavity. Then place the wedges inside.
Take 5-6 cloves of garlic, crushed with skin removed, and stick inside bird, sort the rest around bird (alongside vegetables)
Combine remaining herbs with the warm butter and coat that bird well!
Stick’er in the cooking vessel
Add desired vegetables and sprinkle with salt (more than originally stated)
Cover areas surrounding bird with stock. do Not wash off butter/herb coating on bird skin.
Place in oven 30 minutes uncovered
Reduced heat to 375F and continue cooking up to internal temp of 160F.
This may take up to another hour more
Save carcass to make broth! I’ll update site with instructions for this later.
I wanted to reduce dirty dishes, so I only used one bowl for this pancake mix. I added the egg and scrambled a bit, then slowly added the slightly warmed butter. Note: You just want it to be soft, not hot. You don’t cook the egg. I mixed those up with a whisk, then started adding all of the dry ingredients, seasoning and spices. Once all ingredients were in the bowl, I started with the milk. Add milk until you reach the desired consistency you want to work with. I did not want large, nor too fluffy of a pancake. I added milk until my mixture was was a about as thick as sour cream.
Add some oil or butter to your warm pan/skillet. Pour in your mix. Cook until the batter begins to bubble. Depending on how hot your pan is, you may want to turn the cake over sooner rather that later to avoid burning. If your flipped cake looks GBD (golden, brown, delicous), you can cook the other side about 1 minute and your pancake should be done.
Most importantly. Have fun.
The reason I say that I impressed myself is in regard to the pancake. I am not a trained chef. I just love to cook. As time passes and my experience with cooking devlopes, I realize more and more that I have great intuition when it comes to cooking. I did not look up a recipe, I just threw all of these items together based on my knowledge. These pancakes were really excellent. Since I did not measure any of this, I hope my “recipe” works well for you. Please let me know how it goes if you try.
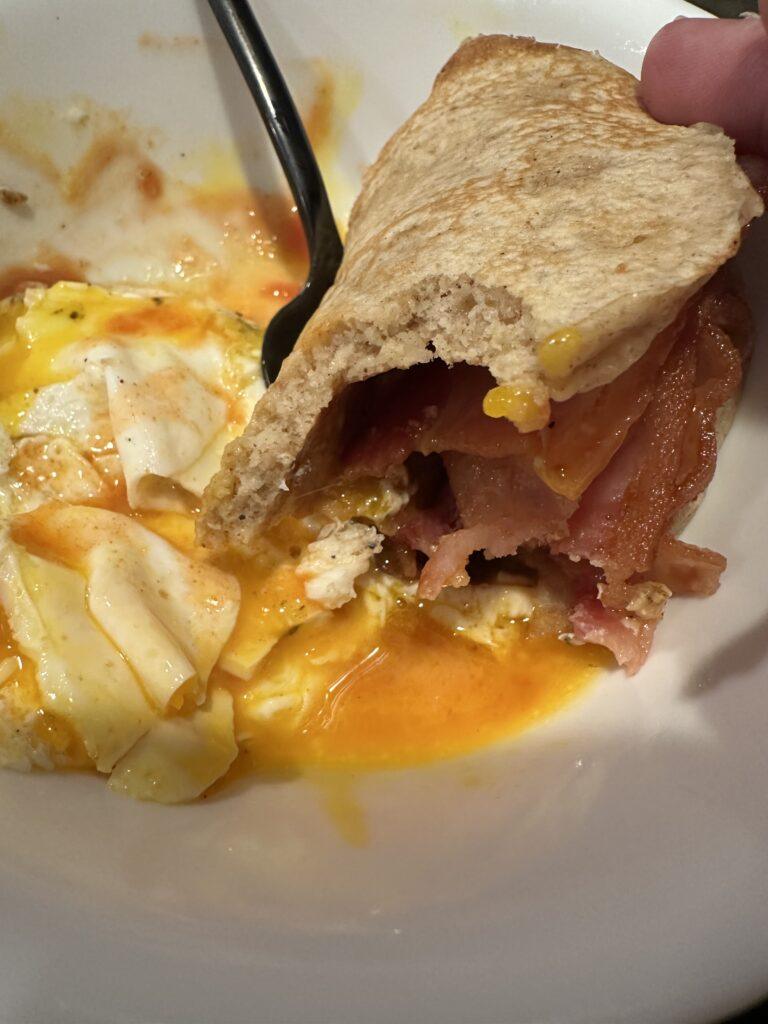
Once my pancakes, bacon and egg were ready, I was could not wait to dig in, but managed to snap the photo before inhaling. I chose to take my pancake and bacon wrap and dip it into my runny yolk. I had ketchup under the egg and Tabasco on top. Delicious! Enjoy!
HOT TIP! If you love heat like I do, try a teaspoon (or more) of this pepper flake to your rice.
Simmer 20 minutes on low/medium heat
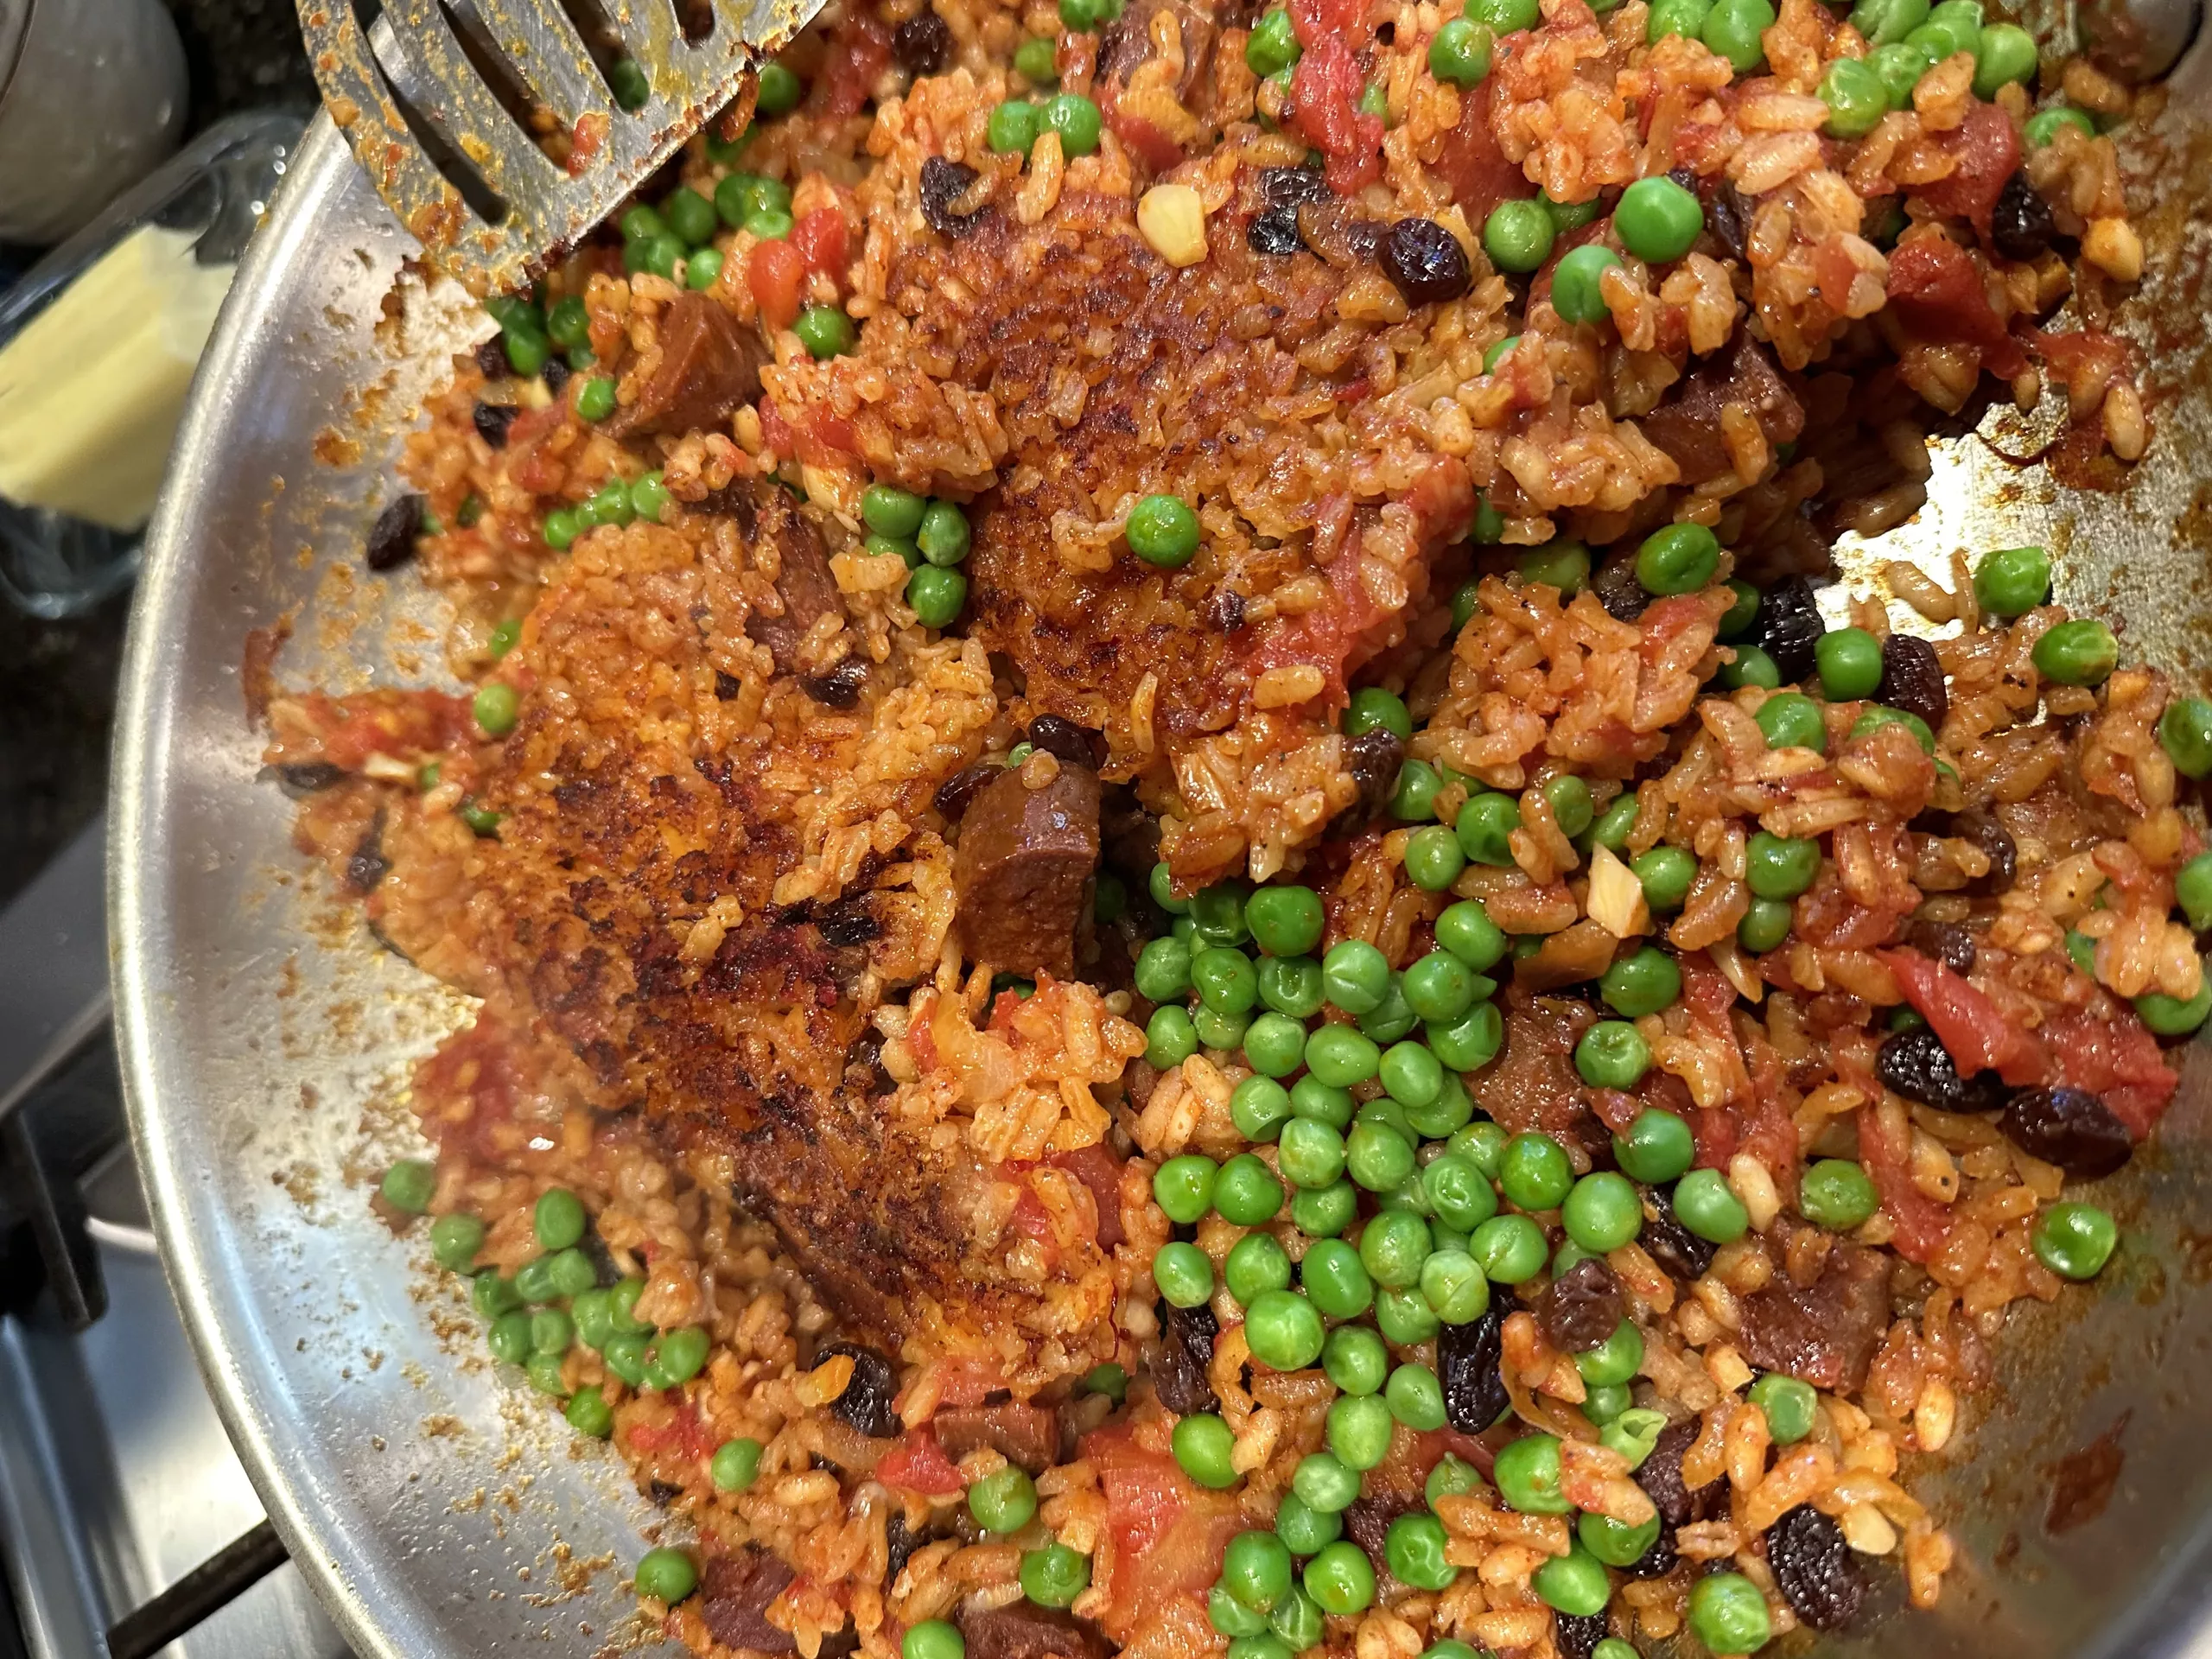
Paella
Add PEAS
A note on Soccarat: It is the crusty crispy bottom of the paella that becomes caramelized and toasted, and actually scorched on the bottom of the pan when it is cooking. It is absolutely delicious. I have not mentioned it above because if you do not consume the paella immediately, this lovely crusty delicious rice element will just get lost in your cold/leftover paella. My tip is to take a bit of your paella, when you are good and ready to eat it, and place in a hot cast iron pan to sear each order to perfection. You will heat the paella on medium-high heat until you smell an almost burnt popcorn scent. If you pull some up and your rice is crusty and brown. EAT! YUM. Enjoy.
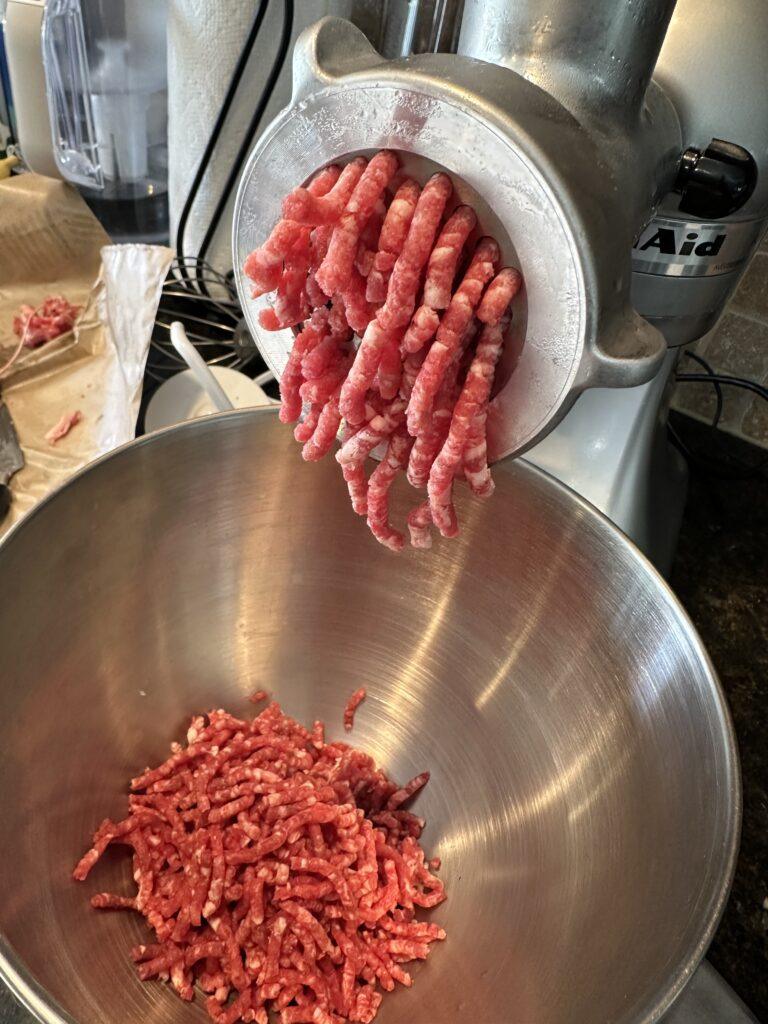
Hello! I don’t think you will be surprised to hear this but grinding your meat at home is a movement that has been gaining traction among food enthusiasts for a while. For me, it’s about taking control of what you eat. When you grind your meat, you’re in charge of selecting the best cuts and knowing exactly where they came from. I try my best to find meats that are fresh or fresh frozen from reputable, sustainable family farms. This step is vital for quality and ethics.
The journey from farm to table doesn’t have to be a mystery. By opting for meats from sustainable family farms, you’re supporting practices that respect animal welfare and the environment. The freshness is unbeatable, and your dishes will showcase that high-quality taste.
Furthermore, customizing meat blends can elevate your meals from standard to gourmet. Ever tried a combination of sirloin and chuck for your burgers? Or maybe a mix of pork and beef for homemade meatballs? The possibilities are endless, and you can always adjust your approach down the road.
And it’s not all about flavor; it’s also a matter of safety. When you grind your meat at home, you minimize the risk of contamination often associated with pre-ground meats from the store. It’s a straightforward step that makes a big difference in food safety, plus it allows for fresher consumption, a key to a delectable and healthy diet.
Choose something that resonates with you, be it for ethical sourcing, unmatched freshness, or the culinary adventure. There’s a lot of opportunity in this simple kitchen practice. In the next section, ‘Your Home Meat Grinder: Mastering the Art of Fresh Meat’, I’ll walk you through selecting the right equipment, the grinding process, and insightful tips to handle your home-ground meat with care. You’re going to find out how to fully embrace the art of fresh meat right in your own kitchen.
Fresh ground skirt steak for hamburgers. Consume only 1 cow, not hundreds.
Your Home Meat Grinder: Mastering the Art of Fresh Meat
So, you’ve decided to grind your meat at home. Congratulations on taking a big step towards healthier and more sustainable eating! With the right equipment, some simple instructions, and a little practice, you’re going to find grinding your own meat to be a rewarding endeavor.
First thing’s first: choosing the right meat grinder is essential. You’ll find a variety of models out there, from manual to electric, and each has its own advantages. Consider how often you plan to use it, the quantity of meat you’ll process, and your budget. Remember; this is a long-term investment in your health and culinary experience. I use the Kitchen Aid Classic stand mixer along with a meat grinder attachment (Note: this is not the one I have but similar and less expensive).
Now, the actual grinding. If you’re a beginner, don’t worry too much about getting it perfect the first time. Start with pre-cut chunks of meat, taking care to keep everything cold. TIP! I actually place meat into freeezer about 30 minutes prior to grindind. This prevents bacteria growth and makes sure the fat gets evenly distributed. I’m here to help you with a simple, easy-to-follow guide that ensures you’ll get the hang of it in no time.
Once you’ve ground your meat, proper storage is key. Use it immediately for the freshest flavor or follow safe storage practices if you plan to cook it later. Airtight packaging and cold temperatures are your friends here. You can always adjust your approach down the road as you become more confident in your processes.
Now, let’s talk about leaning into your creative side. Home-ground meat can be transformed into a variety of dishes, from burgers and meatballs to sauces and tacos. And beyond!
Finally, incorporating home-ground meat into your life is about more than just great flavor; it’s a commitment to a sustainable lifestyle. I really hope that you take the time to source your meat from local, sustainable family farms. Knowing where your food comes from is invaluable, and by supporting these farms, you help promote animal welfare and environmental responsibility.
Remember, your first attempt at grinding meat doesn’t need to be your last. Practice makes perfect, and along the way, you’ll discover not only a new skill but also a greater connection to the food you consume. As you continue on this journey, know that you are making a choice that benefits both your palate and the planet.
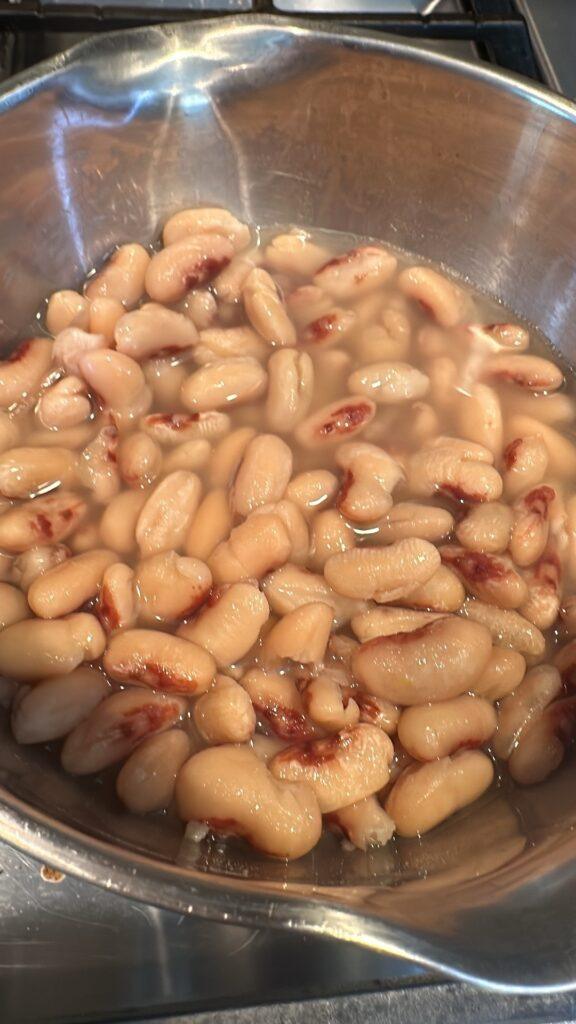
Hey there! I was trying to make use of some inherited can beans today. My first order of business was to make refried beans to add to some mole that I had made previously. Had burrito in mind! Then, I realized that refried beans and bean dip are basically the same thing. Yes? No?
Refried Beans < = > Bean dip???
Funny how those little concepts just pop into your mind at times. I thought it was fun.
I’m going to take you through the transformative process that turns simple onions into a rich, sweet, and flavor-packed ingredient called caramelized onions. This isn’t just about tossing onions on a hot pan, it’s also about the art and science that go into achieving that perfect golden-brown deliciousness.
Choosing the Right Onion: Every variety, from sweet Vidalias to sharp red onions, can affect your final dish in a unique way. Just experiement with different varieties to suit your taste.
Here’s a Step-by-Step Guide to Caramelizing Onions. This includes the patience needed for slow cooking, the right amount of fat to use, and the ideal heat level. You might be surprised to learn that the process takes some time, but the result is utterly worth it.
Slice onions. Start with 1 medium to large white or yellow onion (my favorites) and slice lengthwise. Heat a pan on medium-high heat and add in about a tablespoon of olive oil. Tip: I also use a little butter for extra flavor. Use a big pan so that the onions have room to do be free and not overcrowded. Just be aware that the onions will shrink down significantly when caramelized. That’s okay! It’s how they obtain all of that flavor.
Salt generously. Salt assists in pulling out water and leads to the lovely browning.
Allow the onions to sit and think about what they are doing for a few minutes between stirs. As long as your pan isn’t TOO hot, they shouldn’t burn. As the onions soften, you might add a little water so that the onions can spend more time “reducing” and browning in the pan. This can take 15-30 minutes depending on the amount of onion you use and how hot your pan is.
Add other flavor, if you like. You might add more salt, some pepper, garlic powder, etc.
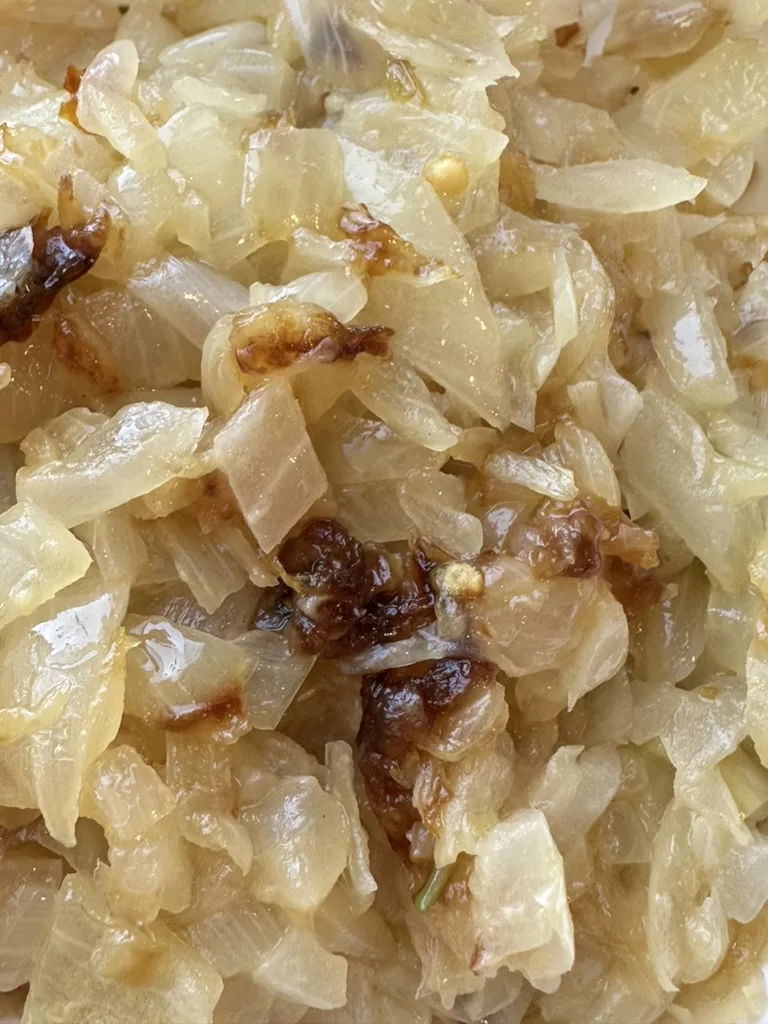
Once the onions are brown and super soft, they are ready.
Caramelized Onions Sweet and Savory
Don’t worry too much about making mistakes.
Just a fun fact: while caramelized onions add a flavor boost, they’re also good for you. They bring vitamins and antioxidants to the table, making them a delicious and healthy choice.
Bonus tidbit! Understanding the Chemistry: The Maillard Reaction is at the heart of caramelizing onions. It’s a complex process where the naturally occurring sugars in onions break down and react with amino acids when heat is applied. This reaction is what gives caramelized onions their distinct taste and deep brown color. See my post about the Maillard Reaction if you are a science geek like me, or simply interested.
In my opinion, caramelized onions are a magical addition to so many foods preparations. Enjoy the journey!
Don’t hesitate to share your creations and how it went. I’d love to hear your feedback, so leave your comments and let’s keep the conversation going.
In 2015, the Federal Trade Commission released their new rules for Disclosure Compliance. These rules are set in place to ensure that readers or viewers of web media (blogs, Youtube videos, etc.) know if the blogger/presenter is sponsored, endorsed, or partnered with a different company. In blog terms, the readers need to know if the blogger is making money by sharing a link or product.
In compliance with the FTC guidelines, please assume the following about links and posts on this site: Any/all of the links PepperBacksIt.com are affiliate links of which I receive a small compensation from sales of certain items.
What are affiliate links?
Purchases are made on external affiliate company websites: When a reader clicks on an affiliate link located on .com to purchase an item, the reader buys the item from the seller directly (not from PepperBacksIt.com). Amazon and/or other companies pay PepperBacksIt.com a small commission or other compensation for promoting their website or products through their affiliate program.
Prices are exactly the same for you if your purchase is through an affiliate link or a non-affiliate link. You will not pay more by clicking through to the link.
I use two main types of affiliate programs:
1. Amazon affiliate links.
PepperBacksIt.com is a participant in the Amazon Services LLC Associates Program, an affiliate advertising program designed to provide a means for sites to earn advertising fees by advertising and linking to Amazon properties including, but not limited to, amazon.com. Amazon offers a small commission on products sold through their affiliate links.
If a blogger links to an Amazon product (with a special code for affiliates embedded in the link), and a reader places an item in their “shopping cart” through that link within 24 hours of clicking the link, the blogger gets a small percentage of the sale. Amazon links are not “pay per click.” If you click on the product link and stay around Amazon and purchase something else, however, I will get commission on that sale.
Anytime you see a link that looks like astore.com/… or amazon.com… it can be assumed that it is an Amazon affiliate link.
2. Product affiliate links. These affiliate links work the same way: if you click the link and buy the product, then the blogger gets a percentage of the sale or some other type of compensation. Things like e-book bundles, e-courses, and online packages are usually affiliate links, as well. Again, prices are not different if you use these affiliate links. You will not pay more by clicking through to the link. These links are not “pay per click”, unless otherwise denoted.
What about sponsored content?
I do not write sponsored posts. I want to bring you real, unbiased information. However, if a post is sponsored by a company and it is a paid sponsorship, I will disclose this clearly in the beginning of the post.
First, I hope you try to use and consume eggs that come from sustainable farms.
Begin with great tools. I have a wonderful small non-stick green pan and a little OXO spatula that help make perfect eggs simple and awesome every time. See recommended products, if interested.
Warm your non-stick pan to medium heat. I use a little butter, about 1 TBSP for 1 egg. When the butter is melted and bubbly, crack your egg. Hover the cracked egg over the pan. Gently pull the shell and let the egg drop out on its own. You need about 2 minutes if your pan is heated correctly. Look for whites to become firm enough to flip. There should be very little clear albumin at this point. The yolk should still look runny (or not hardened). This is when I like to add salt and pepper. Just sprinkle a small layer of each, to your taste. Use a flexible spatula. Tenderly slide under the egg. Try not to pierce the yolk. Swiftly flip the eggs over. If you have enough butter in your pan, the egg might be loose enough to flip over just using a flick of your wrist.
I promise that this is so simple. It doesn’t matter if you are a beginner. Here are the ingredients needed.
Note: this recipe makes one pizza pan sized thin dough
1 cup (plus) All Purpose flour
1 TBSP Active yeast
Warm water (110F), less than a cup
1 tsp Sugar
1/2 tsp salt
Let’s do it! Grab a medium to large sized mixing bowl. Begin my adding yeast, sugar and about 1/2 cup of the warm water to the bowl. Stir and allow it to sit for about 5 minutes. This allows the yeast to bloom. When it starts to flower/bloom, you know the yeast is working and you can move on with your dough.
Add in the flour and salt, mixing and watching the the ingredients come together into a soft dough. When you are able to touch the dough without it sticking to your fingers, you have arrived at the correct consistency. Knead the mixture for a few minutes with your hands. Form the dough into a ball and let it sit, covered in the bowl for 30 minutes. After 30 minutes the ball should be twice as large as when you left it. Very cool. Smash down the dough, and work it with your hands. You will likely need to add more flour to arrive at a springy dry, but not too dry, dough ready to roll out.
Flour a large surface and place your dough ball on it. You can use your hands alone to work the dough into a pie shape. I do love my roller (see recommended products). I find it makes the job much faster. That’s what we want when we are making PIZZA! Once you have your dough rolled out, place it on you pizza pan and let’s build the pie.
Ingredients for my heirloom tomato pizza
Large heirloom tomato, sliced – Substitute any tomato you like if heirlooms are not available
Fresh basil, as much as you prefer
1 cup shredded Mozzarella cheese
1 ball of fresh soft Mozzarella, torn into bite sized chunks
1/2 cup plus Tomato paste, or a jar of premade pasta sauce
I begin by smearing a pretty saucy amount of paste or sauce onto the rolled out dough. I then place a base of dry mozzarella. Top the cheese with the tomatoes, basil (torn and twisted to bring out flavor), and torn fresh mozzarella. I finish with a sprinkle of salt and pepper over the pie.
I bake at 450F for about 13 minutes. Allow to rest on a resting rack about 5 minutes. Place back on the pizza pan to cut and ENJOY!