Tips For Perfecting Homemade Pasta Sauce

Pasta Sauce

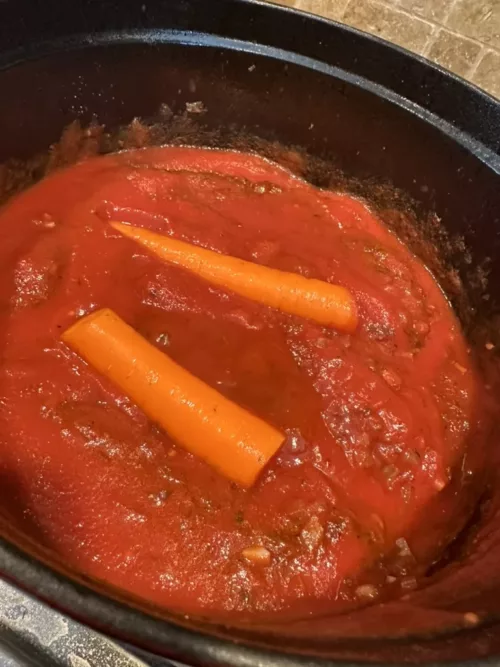
Quality ingredients can make or break your pasta sauce. Freshness is everything. Fresh tomatoes, herbs, and other ingredients are game changers. Go for the freshest options you can get your hands on. If fresh tomatoes aren’t available, reach for high-quality canned ones. San Marzano tomatoes are a solid choice for their rich flavor. To be honest, I generally do not have really fresh heirlooms available to me, so I opt for the canned San Marzano’s often.

Herbs and spices bring life to your sauce. Fresh basil, oregano, and thyme can take your sauce from good to unforgettable. Chop them just before adding them to keep their flavors vibrant. Don’t forget the power of garlic and onions. Sauté these until they’re golden and fragrant – this forms the base of your sauce and adds depth.

The olive oil you choose matters too. Extra virgin olive oil stands out with its robust flavor. It doesn’t just cook your veggies, it adds a layer of richness. Don’t go overboard. Olive oil does have a flavor. It is not a cooking oil, like Canola. They are intentionally less flavorful so that your fried foods will not be affected by the oil taste. So, with Olive oil, take it easy when adding. A few tablespoons are enough to get that smooth, silky texture without making it greasy.

Salt and pepper are your trusty sidekicks, as per usual. Seasoning as you go helps build layers of flavor. Taste your sauce as it simmers and adjust accordingly. Everyone’s palate is different, so go with what tastes right to you.

Mastering the Cooking Technique

Sautéing aromatics like garlic and onions is your first crucial step. Heat your pan, add some olive oil, let it warm, and then toss in your chopped garlic and onions. Keep it on medium heat to avoid burning. You’re aiming for them to turn golden and give off a mouthwatering aroma. This forms a flavorful foundation for your sauce.

Deglazing the pan can add an extra flavor punch. After sautéing your garlic and onions, add a splash of wine or broth to the pan. Scrape up the browned bits stuck to the bottom; that’s where the magic happens. This not only enriches your sauce but also gives it a thicker consistency.

The simmering part is where patience comes in. Unlike boiling, simmering your sauce over low heat allows the flavors to meld together slowly, creating a deeper, more cohesive taste. Avoid the urge to rush this process. Stir occasionally to prevent sticking and burning.

When it comes to reducing, it’s about achieving that perfect thickness without overcooking. Keep the heat low and let the sauce bubble gently. Too high and you’ll end up with a burnt, overly thick sauce. Keep an eye on it, stirring occasionally, to nail that perfect consistency.

Timing and temperature: you want the sauce to cook low and slow to let those flavors develop fully. Rushing it will leave the sauce underdeveloped in taste. Low heat and longer cooking times are your allies in creating a sauce that’s rich, thick, and bursting with flavor.

Adding Personal Touches

Customizing your pasta sauce can make it truly your own. Adding proteins like meat, seafood, or even plant-based options can make a world of difference. Ground beef, pork, or Italian sausage give a hearty flavor. Seafood like shrimp or clams adds a lighter, oceanic twist. For plant-based choices, mushrooms or lentils work exceptionally well.

Cheese lovers, this one’s for you. Adding cheese can transform your sauce from good to mind-blowing. Parmesan, pecorino, or even a touch of goat cheese can add a new dimension of flavor. Stir it in at the end of cooking to keep that creamy texture.

Wine, broth, or balsamic vinegar can elevate your sauce to new heights. A splash of red wine deepens the sauce’s flavor and richness. Chicken or vegetable broth adds subtle complexity. Balsamic vinegar can provide a tangy sweetness that cuts through the tomato’s acidity.

Don’t underestimate vegetables. Adding vegetables like bell peppers, zucchini, or spinach not only boosts the nutritional value but also adds interesting textures and flavors. Chop them finely or blend them if you prefer a smoother sauce.

Personal touches are what make your pasta sauce unique. Experimenting with different ingredients and finding your special twist can create a signature sauce that’s unforgettable.

Storage and Serving Tips

How you store your homemade pasta sauce can make a big difference in maintaining its flavor and texture. If you’re planning to use it within a week, keep in a sealed container in the fridge. For longer storage, freezing is your best bet. Portion the sauce into freezer-safe bags or containers, and it’ll stay good for months.

Reheating takes some finesse to avoid a watery or overly thick sauce. Thaw frozen sauce in the fridge overnight and reheat gently on the stove over low to medium heat. Stir frequently to keep it from burning and taste to re-season if needed. A splash of fresh stock or a bit of olive oil can help revive the sauce without altering its flavor too much.

Pairing your sauce with the right pasta shapes can make all the difference. Robust, chunky sauces go great with wide noodles like pappardelle or tube-shaped pasta like rigatoni. Smoother, more delicate sauces pair beautifully with spaghetti or linguine. Remember, the pasta shape can affect how well the sauce coats and clings to it.

Got some leftover sauce? Get creative. Use it as a base for soups or stews, spread it over a homemade pizza, or even use it to jazz up a grain bowl. Leftover pasta sauce can also be transformed into a dipping sauce for breadsticks or drizzled over roasted veggies for an extra burst of flavor.

Make sure to ENJOY!


Simplest “mole” EVER!

Whenever I talk about making mole, people exclaim “it’s too difficult!” Please try this ultra simplified version and let me know what you think.

Note: If you want this with shredded chicken, start that first. See easy instructions below.

INGREDIENTS

  • 1.5 cups Chicken broth
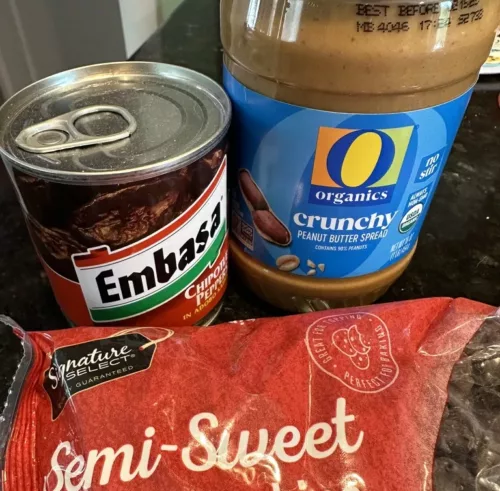
  • 1/2 can chipotle in adobo
  • 2 TBSP peanut butter, I prefer crunchy
  • 1/4 cup semi-sweet chocolate chips
  • Handful of crunched tortilla chips
    • Note: I didn’t have tortilla chips so I used Garden Salsa Sun Chips
  • 3 tsp salt
  • 1 tsp cumin
  • 1 tsp freshly ground black peppercorns
  • 1 tsp garlic powder
  • 1 tsp pepper flakes
  • pinch of cinnamon (optional)

INSTRUCTIONS

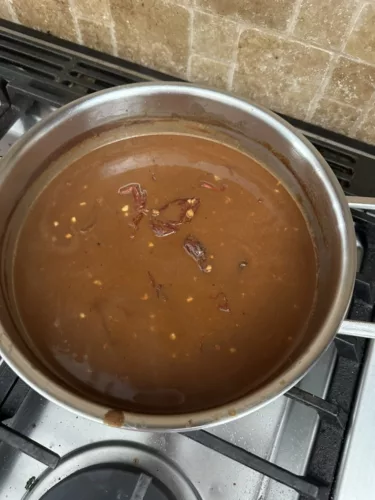
Once you have all of your ingredients gathered, simply throw them all in a nice saute pan on pretty low heat to gently simmer all of the yummy flavors together. Keep a close eye on the saute pan at first, stir frequently, to ensure that chocolate does not stick to the bottom. If is it doing so, turn down the heat. Let this sauce simmer about 15-20 minutes. Once it is the consistency of molasses, it is ready to eat. Have it on anything you desire!

I love adding in shredded chicken and making burritos.

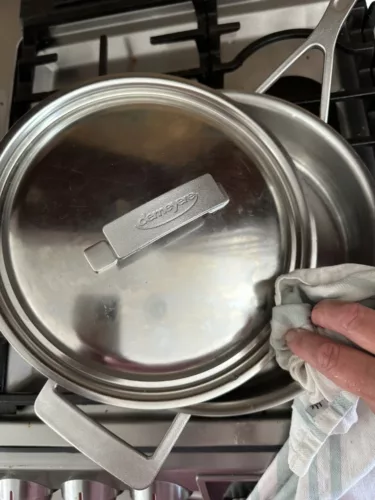
If you do not have a quality saute pan but want one, definitely think about buying the Demeyere. It has no rivets, so clean-up is very easy and it distributes the heat so well.

IF you want to add chicken?

I highly recommend using an Instapot. For ratio that works well with the quantity of mole in this post, simply place 2 chicken breasts in the Instapot and cook on poultry. I add some cloves of garlic and salt, but you don’t HAVE to. When the pot is finished, hopefully, the chicken is ready to shred. Just take a couple of forks and pull it apart. Add to mole. YUM

Please ENJOY!

Amped Up Red Eye Coffee Drink

A Little Coffee Talk

I love coffee. When I was pretty young (for coffee), say 13, I started being curious about coffee. Sure, I tried drinking standard drip/coffee pot Folgers coffee. That didn’t last long. The little scientist in me thought, why drink all of this volume when you could just concentrate it and get more bang for your buck? And so it began. My Grandma would say that my coffee was so strong that you could put a fork in it and it would stand up!

I have never stopped drinking coffee. Eventually, I began drinking espresso exclusively. I have owned espresso machines for decades. Like many, my morning routine begins with coffee. In my case, I generally have a double-shot of espresso. Quick and easy. However, I do enjoy making coffee drinks, like cappuccinos, for friends.

Today, I was inspired to make a video of me creating a Red Eye coffee drink. I have those sometimes when I want a little more volume and more kick/energy.

Pictured Here: Click links to purchase

Click this link to visit my YouTube channel and watch me make this Red Eye Drink!

Pulled Pork Sandwich

An absolute favorite. Savory, spicy, delicious.

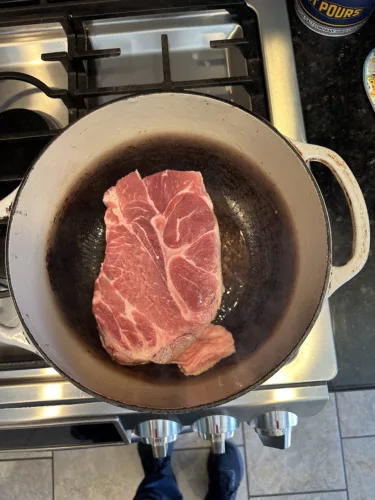
Raw pork shoulder into cast iron dutch oven
Pork in progress
Pork in progress
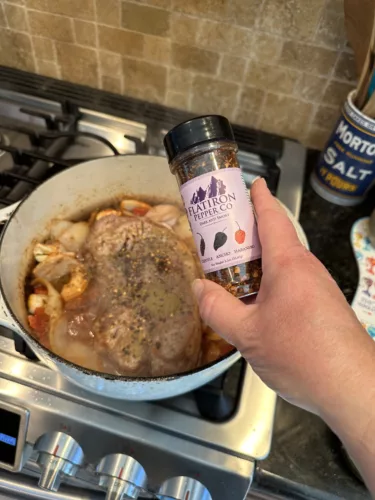
before stove. Don’t forget pepper flakes for KICK!
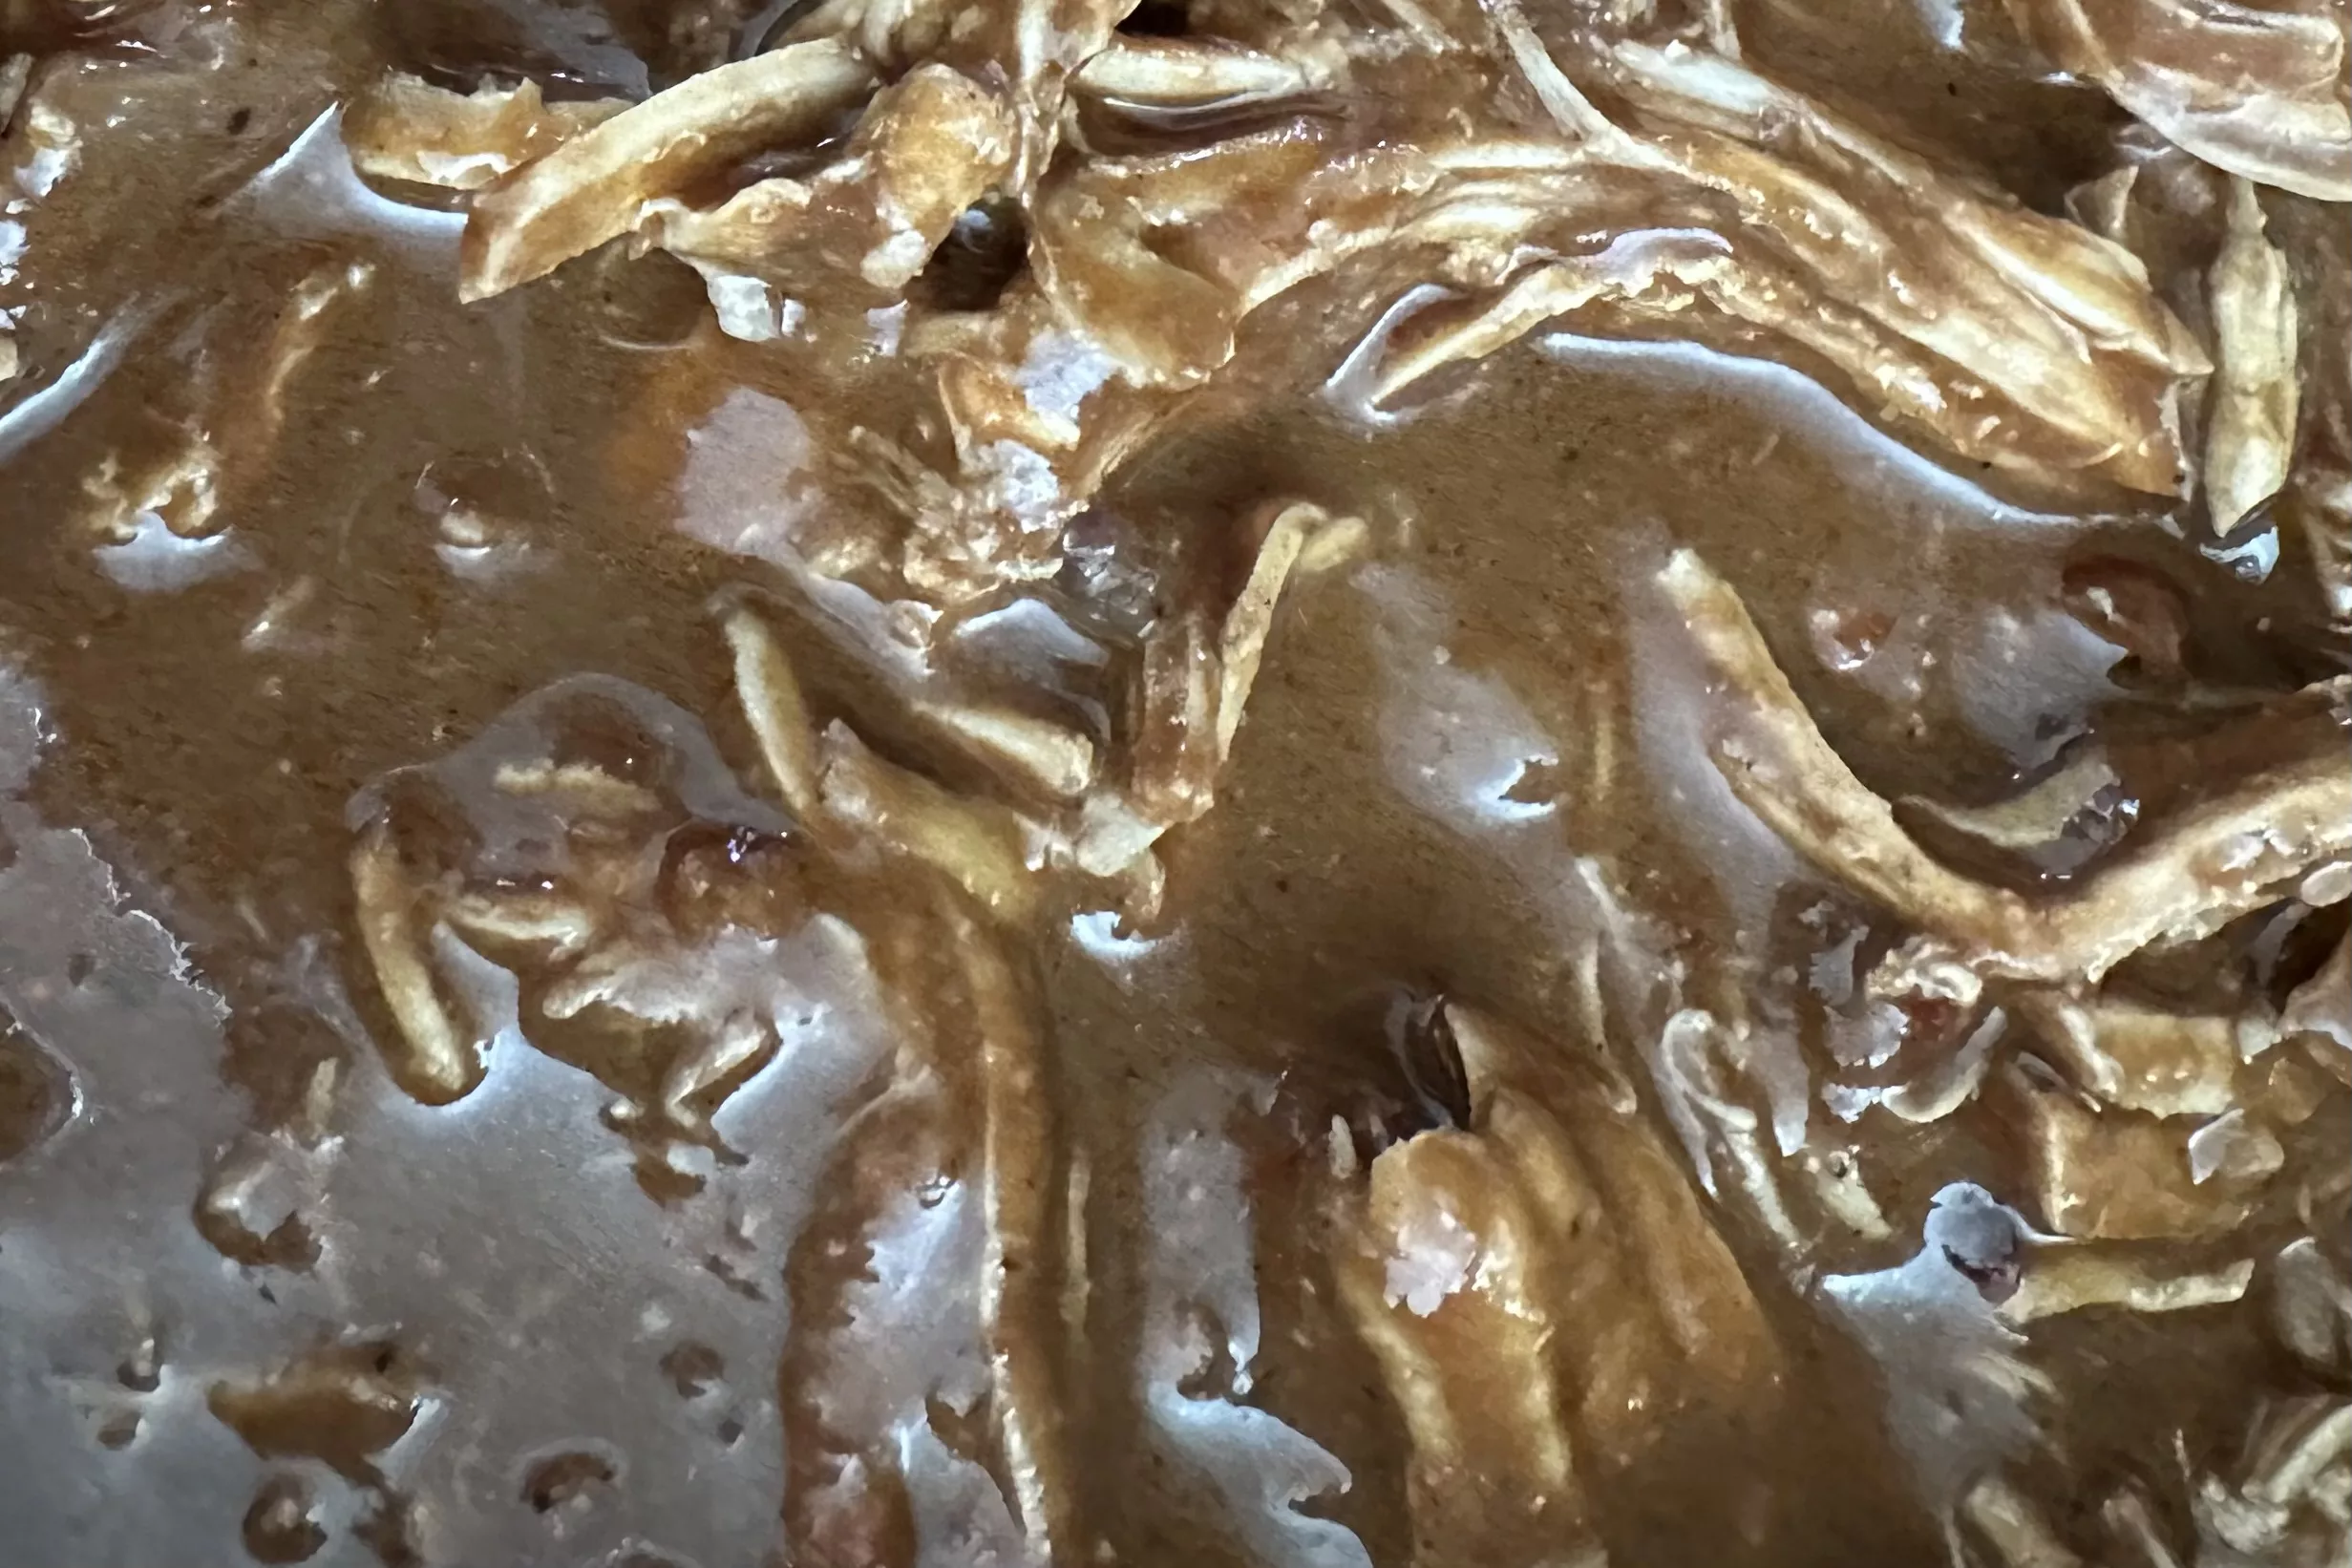
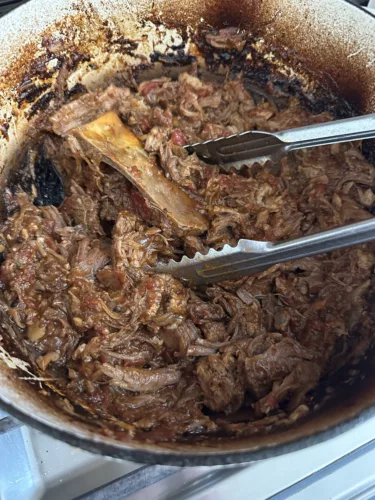
3+ hours later, pulled pork is ready
pulled pork is ready
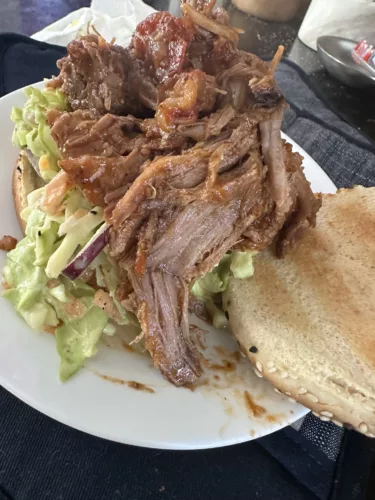
Pulled Pork Sandwich

Ingredients:

  • 3lb pork shoulder/butt. Bone-in preferred but not necessary. Preferably room temp.
    • Note on meat selection: I really try to support sustainable farms whenever possible. The meat is the best you can get and you will taste that in your delicious final product. In this case, I used a should from this farm:
    • https://www.peadsandbarnetts.com/
  • 3 TBSP salt
  • 1 large either yellow or white onion
  • 1 can chopped tomatoes. I prefer organic.
  • 1 cup chicken or beef broth
    • If I don’t have any broth I prepared myself, I use this Better than Bouillon Add 1-2 tsp to warm water, dissolve and add to pot.
  • 2 TBSP freshly ground black peppercorns.
    • Note: Use less if you don’t LOVE pepper.
  • 1 TBSP Pepper Flakes. I use the Flatiron Dark and Smokey for this dish.
  • 1 TBSP Cumin

Instructions:

  • Take meat out of refrigerator and salt entire surface generously, 30 minutes-1 hour, depending how much time you have.
  • Turn on oven to 375F degrees.
  • Heat up your dutch oven, add a little cooking oil and allow both to get hot, ~3-5 minutes.
  • Add pork shoulder and sear on all sides. The more brown, the better. You want to have a brown crust for best flavor in the final product.
  • Remove pork and set aside.
  • Add chopped onions to pot with a little water. Cook on high heat for a few minutes to brown them and deglaze the browned, crusty pork bits from the bottom.
  • Once onions are soft and browned, add pork back into dutch oven.
  • Turn heat to high and begin adding the rest of your ingredients:
    • Can of tomatoes
    • Broth
    • Pepper and Pepper flakes
    • Cumin
  • If these ingredients are surrounding and almost covering your pork, you should have enough liquid for the rest of the cook. Bring them to a boil.
  • Once your ingredients are boiling, cover and place into your preheated oven.
    • A good rule of thumb is cook meat for 1 hour/pound.
    • I check my meat at 2 hours to check that there is still moisture in the pot.
    • Check again at 2.5 hours. The pork should be getting tender enough to pierce with a fork. If so, uncover and turn heat up to 400F.
  • At 3 hours, Remove from oven. Now, you should be able to pull the meat apart to your desired consistency.
    • Not necessary but I like to continue cooking until most liquid is absorbed.

So MANY options now!

Historically, around our house, we use this preparation over several meals. We are only 2 people, so it goes a long way. We use the pork for a traditional pulled pork sandwich, as shown above. We also create pulled pork pizza. AND, we make this pork over noodle dish (with chimichurri). I’ll share these preparations as I build out this site.

Whatever you do with this wonderful braised pork, be sure to ENJOY!!!!

Shrimp Noodles

Hungry and want to eat in about 10 minutes?

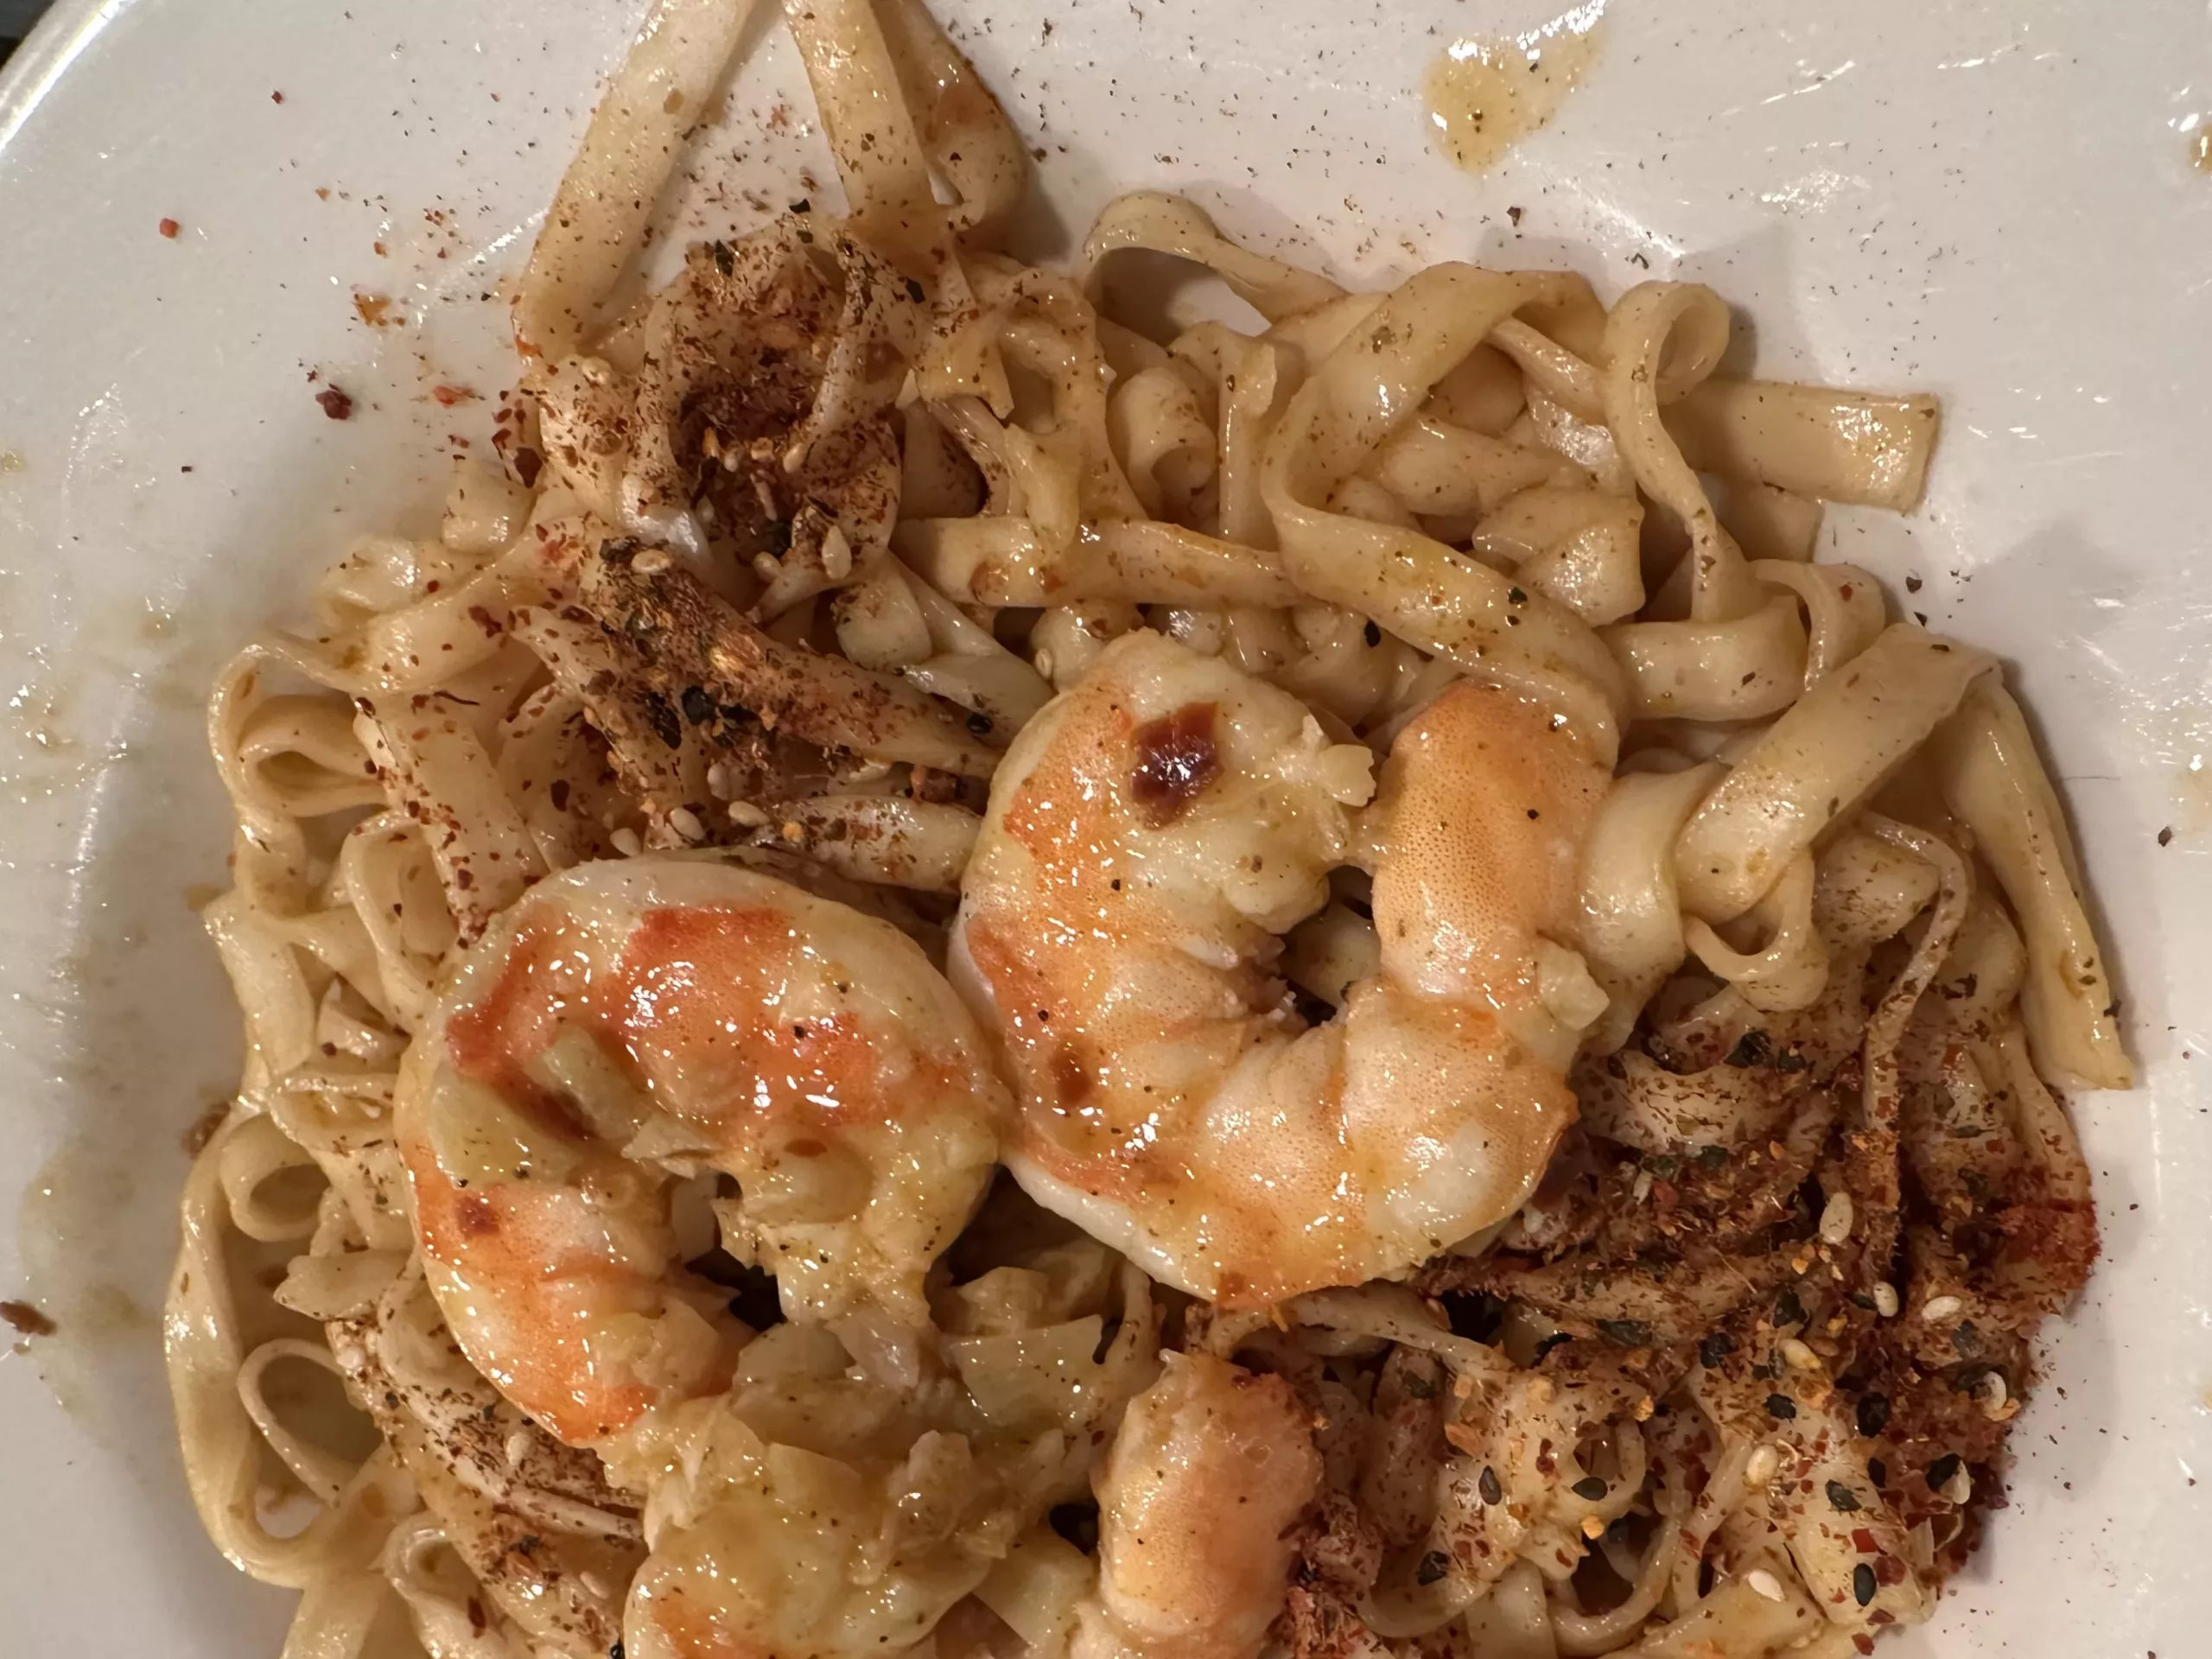
Shrimp Noodles
Super Quick Meal of ramen noodles with shrimp

Ingredients:

  • Ramen noodle pack
    • I love these: Momofuku Noodles
      • Try the variety pack of Momofuku noodles I have linked above. All of them are fantastic.
  • Previously Shelled and deveined shrimp.
    • I use frozen ones that prepared and ready to cook.
  • Salt and Pepper
  • To add SPICE! Highly recommended (as I am Pepper and love HEAT). Sprinkle on as much as you can handle. LOL

Instructions:

  • Take shrimp out of freezer, rinse and pat dry. Let them sit.
  • Start water in a small pot.
    • Note: I only use enough to coat the noodles for faster boiling.
  • Start heating the pan for shrimp while you are waiting for water to come to a boil.
  • Once water is boiling, add a teaspoon of salt and stir (optional, but I like to do this to season the noodles themselves).
  • With water boiling and pan hot, start cooking!
    • Add noodles to pot. Cook per package instructions, 3 or 4 minutes.
  • Add butter to hot pan and then add shrimp and sprinkle with salt and pepper.
    • Turn pan to medium-high and cook shrimp for 3 minutes. Turn over and go take care of the noodles!
  • While noodles are draining, take shrimp out of pan. Make sure they are now white and completely cooked (and hopefully, not OVER-cooked). They have likely cooked for at least 4 minutes now.
  • Place noodles into a bowl, add all ingredients, top with shrimp. You are done!

EAT and Enjoy!

Good Old Cast Iron Pan

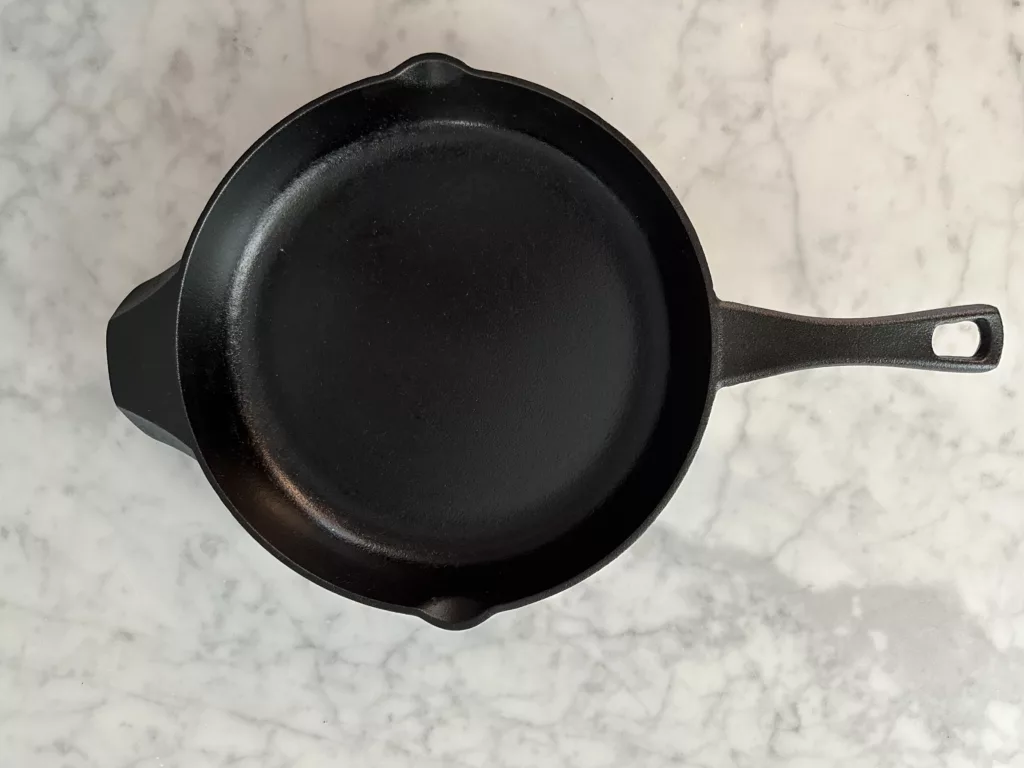
Hello. I have chosen to show you this cast iron skillet, it is by Calphalon. I feel this pan is a little lighter than some other brands. Also, I enjoy having the pour off lips on the edges.

Cast Iron Pan
Cast Iron

You might think this is such a random item to feature? I just kept feeling I had to share the wonder of a cast iron pan. What if people are afraid of using them? Don’t be!

Here are just a few of the wonderful benefits.

  • Durable – a cast iron pan should last forever
  • Heat distribution – Cast iron is an excellent conductor of heat which makes it perfect for cooking. For science people: Thermal energy is the kinetic energy of vibrating and colliding atoms in a substance. Ohhh, I want that when I’m cooking!
  • Iron – the pan may deliver a little extra iron to your diet
  • Easy to clean – I never use soap on my cast iron skillets. Just scrape it out with something like a chore boy and rinse with hot water.

About Me

Hello There. I’m Stephanie, the face and flavor behind Pepper Backs It. You might be wondering, “Who’s Pepper?” That’s me, too. As a child, my beloved Grandma Pat called me “Peppermint.” As I grew older, I shortened the nickname to Pepper. It became a truly valued alter ego as my cooking life flourished and I realized how much I adore the spice, pepper.  I also just love spicy food. Pepper Backs It stands for my passion project, where casual home cooking meets learning and sharing.

Sharing is a gratifying practice to me. Throughout my life, I have had many opportunities to coach, mentor, advise people. Helping people learn is kind of like a talent of mine, I guess. Here at Pepper Backs It, I hope to share some recipes, nifty quick meals, and general kitchen wisdom I’ve accumulated over the years. Please know this site is not all about recipes; I also delve into the ‘why’ and ‘how’ so you can cook smarter, not harder. I will mix life stories with a bit of science behind the food we enjoy daily. The kitchen is my laboratory, and I want to pass along the “eureka” discoveries that make cooking a delightful experience. Whether you’re a kitchen newbie or a seasoned cook looking for a fresh perspective, you’re in the right place.

Ultimately, I seek satisfaction for my soul. I hope you will join along and find satisfaction for your soul, as well.

From Disappointment to Discovery: My Food Philosophy

I was once like you, facing the kitchen with a mix of hope and hesitation. I started cooking at home many years ago, driven by disappointment with restaurants that too often left me underwhelmed or, even worse, unwell from foodborne illnesses.

You’re probably asking, ‘Why does that matter?’ Here’s why: each unsatisfying meal was a nudge towards the stove, each bout of illness a reminder of the hidden hazards in my favorite dishes. These experiences weren’t just setbacks; they were my call to culinary arms.

In my opinion, cooking at home offers an element of control that dining out can’t match. It invites you to interact intimately with your ingredients, to understand the whys and hows of each recipe. I find this process empowering.

I’ve found joy and pride in perfecting the classics, experimenting with flavors, and occasionally (let’s be honest, frequently), surprising myself with the results. Now, I’m here to help you do the same.

So what’s the essence of my food philosophy? It’s simple: make it delicious, make it safe, and make it an experience to savor. Through my journey, I’ve honed a collection of recipes that I can’t wait to share with you.

As we continue to learn and grow together, I promise to feed not just our bellies but our curiosity for food science and the techniques that elevate our home cooking. I really believe that everyone deserves to cook with confidence and to enjoy meals that are a true reflection of their taste and care.

Tune in to Pepper’s Picks: Tested Trusty Tools & Treats

Bonus prize content! I’m not just here to showcase my favorite recipes, I’m here to cut through the clutter and get you straight to the good stuff. That’s right, I take time out of my schedule to rigorously test and select kitchen tools and ingredients that I truly believe in – because I want you to experience the best in your culinary adventures, and beyond.

If you’ve ever felt lost in the aisles of a kitchen store, wondering which gadgets are worth your hard-earned money, then you’re exactly where you need to be. My kitchen is your kitchen, and I’m constantly on the lookout for products that are not just good, but great. It’s not just about making a meal, it’s about making a statement with tools and treats that stand the test of time and taste.

Here’s a little secret: I never intended to become the go-to person for kitchen advice. But after seeing the impact of my recommendations on my coworkers and friends – how a simple suggestion can turn into a kitchen revolution for them, I knew I had to share what I’ve learned with a wider audience. Think of me as your culinary curator, filter, and friend. I’m here backing it all up with experience and passion.

Finally, I want our journey in Pepper Backs It to be bright, delightful, and, most importantly, fun! Cooking is a celebration of flavors, life, and togetherness. Let’s make sure every time we step into the kitchen it’s with a smile, ready for an adventure. Remember, I’m here with you every step of the way, sharing knowledge, excitement, and maybe even a few laughs. Here we GO! Roll up your sleeves, grab your favorite apron, and let’s create some fantastic food memories together!

As I hone in on the direction I want this site to go, I will feature various topics and products. I have no desire to try to compete with online chefs. I am literally simply sharing my life.

Remember: We are seeking satisfaction for our souls.

Me!
Pepper, aka, Stephanie

Pancake Breakfast Sandwich with Impossible “sausage”

Lessen Meat Consumption

This breakfast sandwich will not disappoint.

Steps:

  • Make little pancakes. These are about 3 inches wide, or a little larger than a slider.
  • Fry up some Impossible breakfast sausage. I like the spicy variety.
  • While sausage is finishing, add some cheddar cheese to melt.
  • Fry an egg.

Construct! Stack all items between little pancakes. Add ketchup and tabasco, if you like.

ENJOY!

Sea Bass with Butter Curry and Rice

Quick yet rich and decadent

I think you will really love this if you are a fan of curries. In this case, I actually purchased the curry sauce. That is how this becomes a rather fast meal.

Ingredients:

  • Any white fish. I love Sea Bass, so I used it here.
  • Store bought butter or masala curry simmer sauce
  • Jasmine rice – I use organic jasmine rice
  • Green Squash cut into half circles
  • Bell pepper cut into bite size pieces
    • Note: I used the above 2 veggies based on taste and texture preference but you may use any vegetable you like.

Directions:

  • Find 2 pans to cook/saute in and 1 pan to boil the rice
  • Chop up all of your selected veggies. In a medium hot pan, toss veggies in with a little butter or oil.
    • Note: Cook until they are tender ALMOST to your liking. You will be cooking further within the sauce in a few minutes. Start your rice using package intructions, except substituting the 1/2 (or more) of the water with coconut milk.
  • Start your pan for the fish.
    • I recommend your fish is at room temp before throwing into pan.
  • Once the pan is hot, add cooking oil and toss fish in. Turn heat to medium-low. Keep fish on one side until it is nearly cooked through. Depending on the fish, this could be anywhere from 3-5 minutes.
  • Add the butter sauce to your veggie pan to allow veg and sauce to marry while also heating up the sauce.
    • Depending on the product you have purchased, you may need to add some water. These curries sometimes come more like a paste than a sauce.
Mid-point! Check all of your pots and pans and ensure they are all being heated nicely but not burning 🙂
  • If your rice is done, let sit while you finish this dish.
  • You can turn over your fish. If it is flakey, it is done.
  • Choose your adventure: You could …
    • Add fish to your pan with veggies and sauce. OR
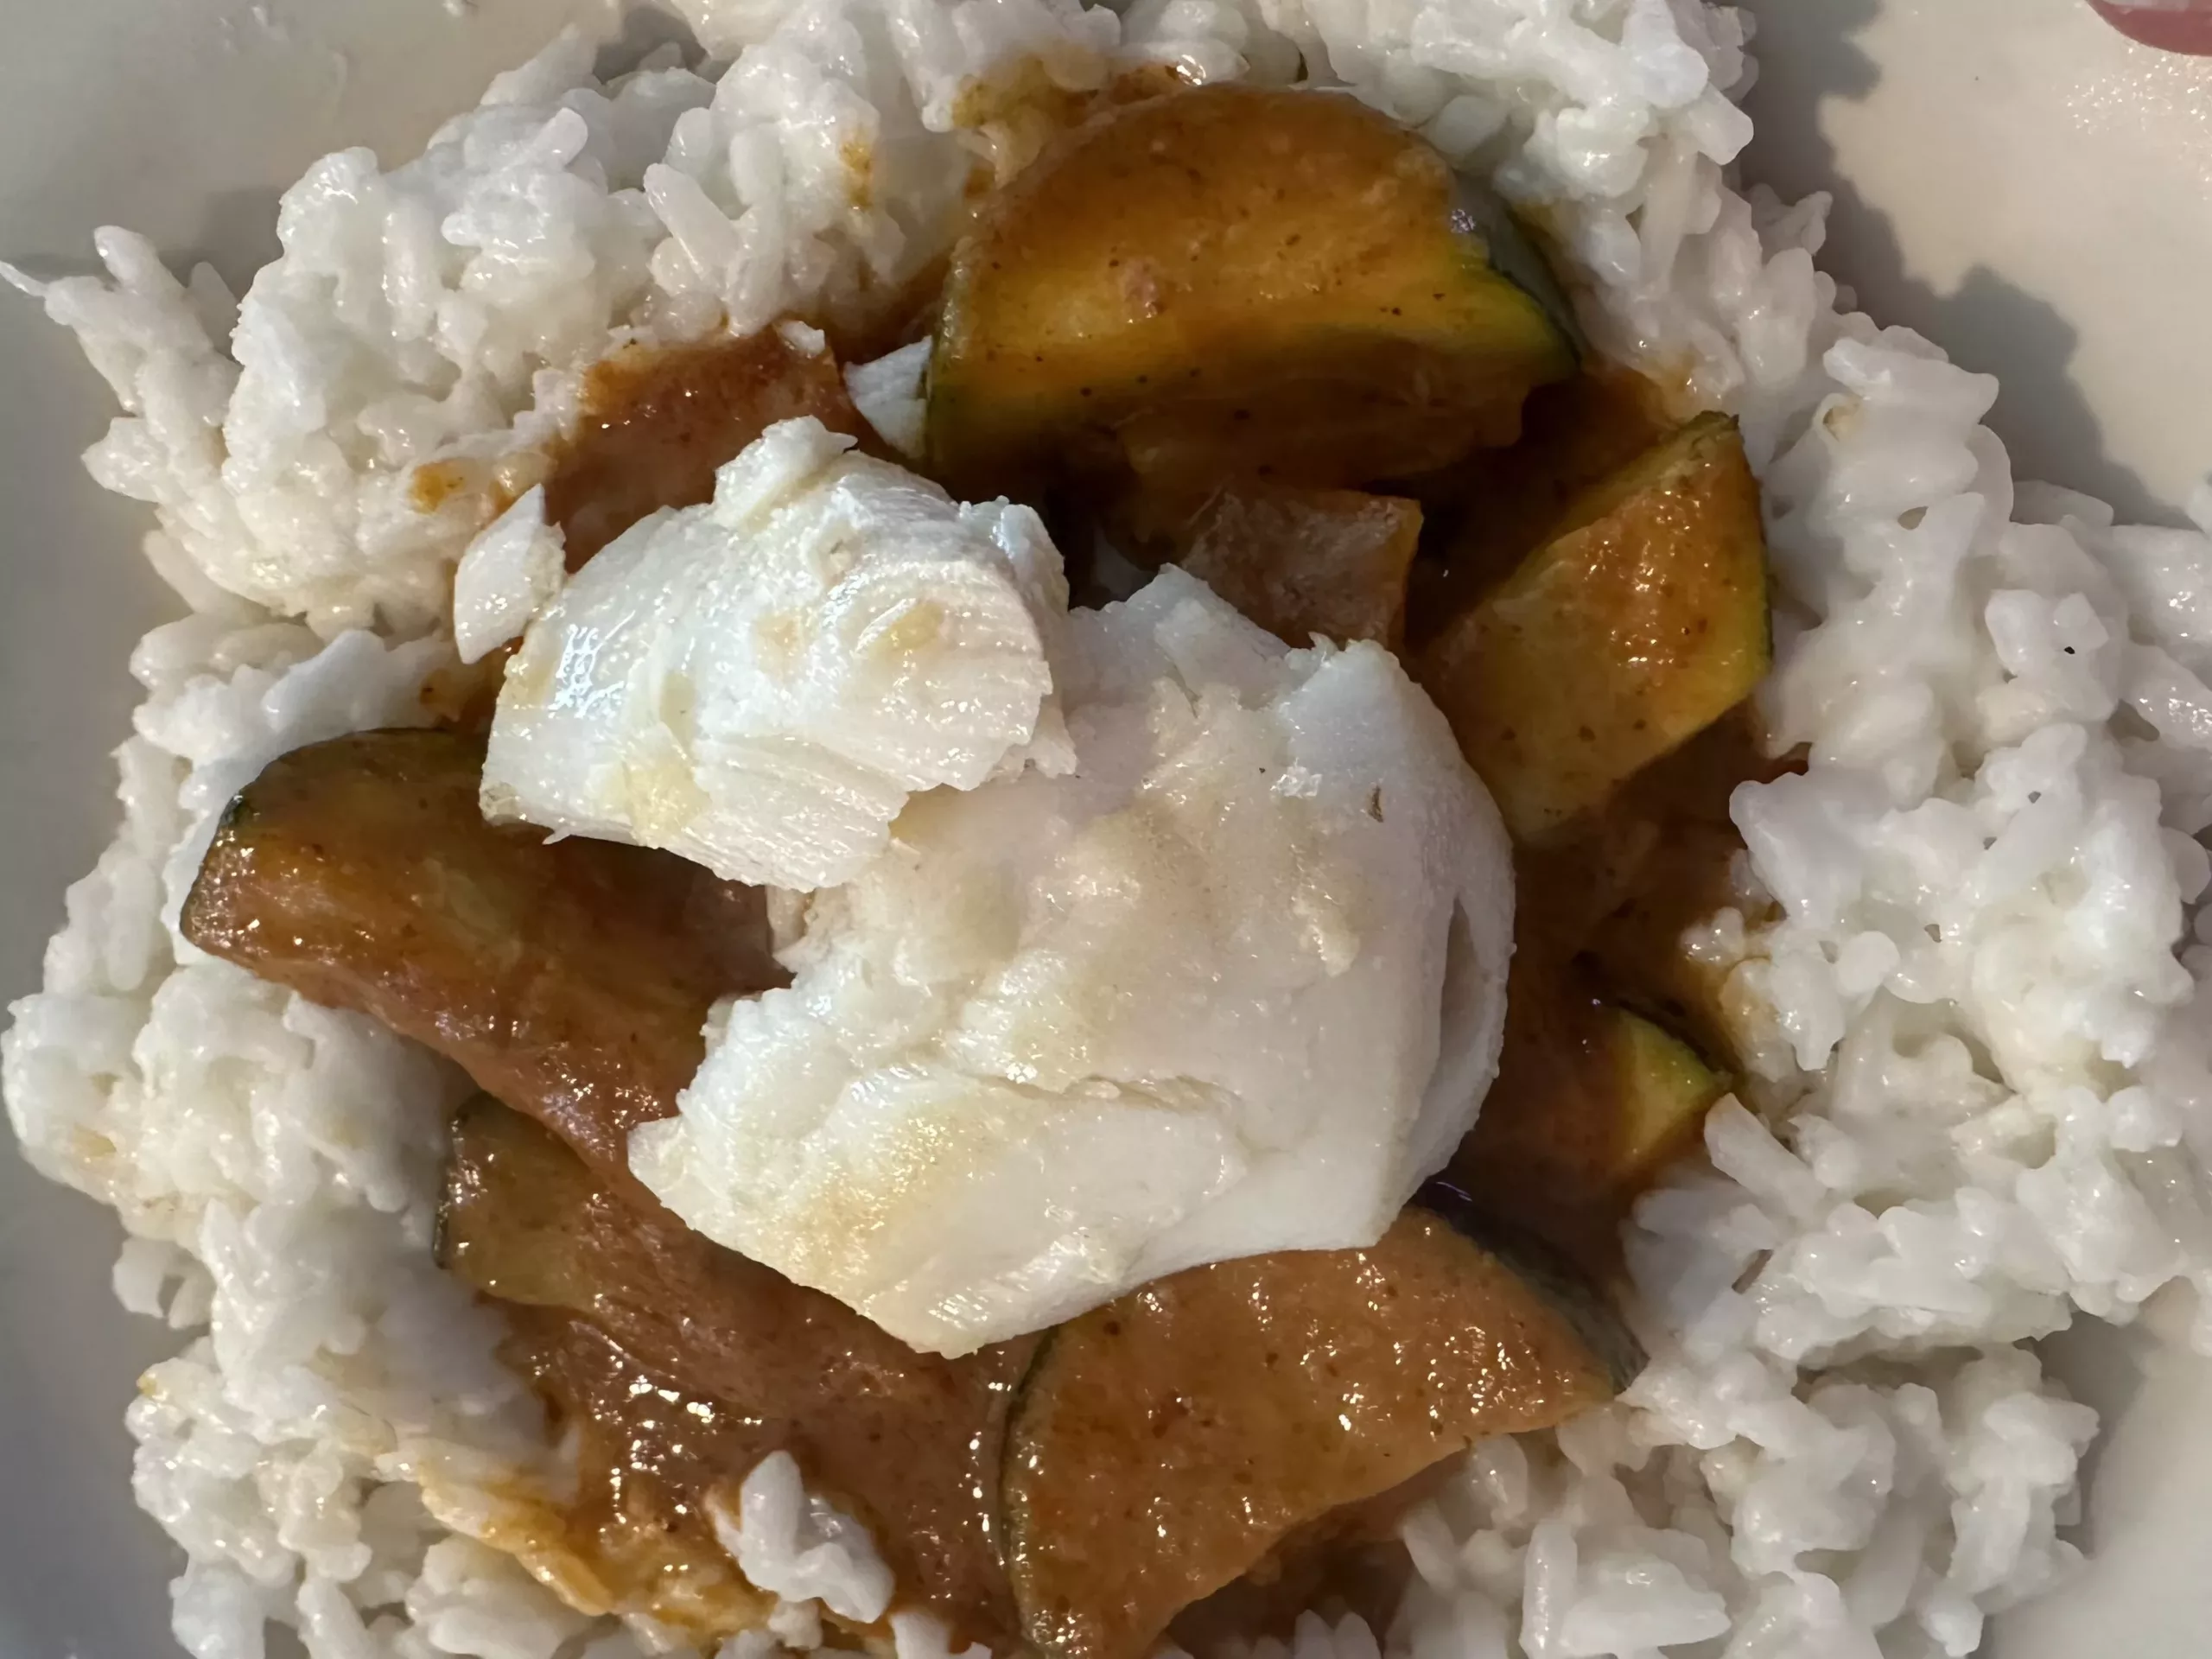
    • Keep it as a topper as I did (shown in photo)
  • Place a base of rice into a bowl, then ladel on sauce.

End to end, this could take you less than 20 minutes. Not that I am rushing you! Some folks just like to know about a fast meal.

All Done! Great job. ENJOY.